
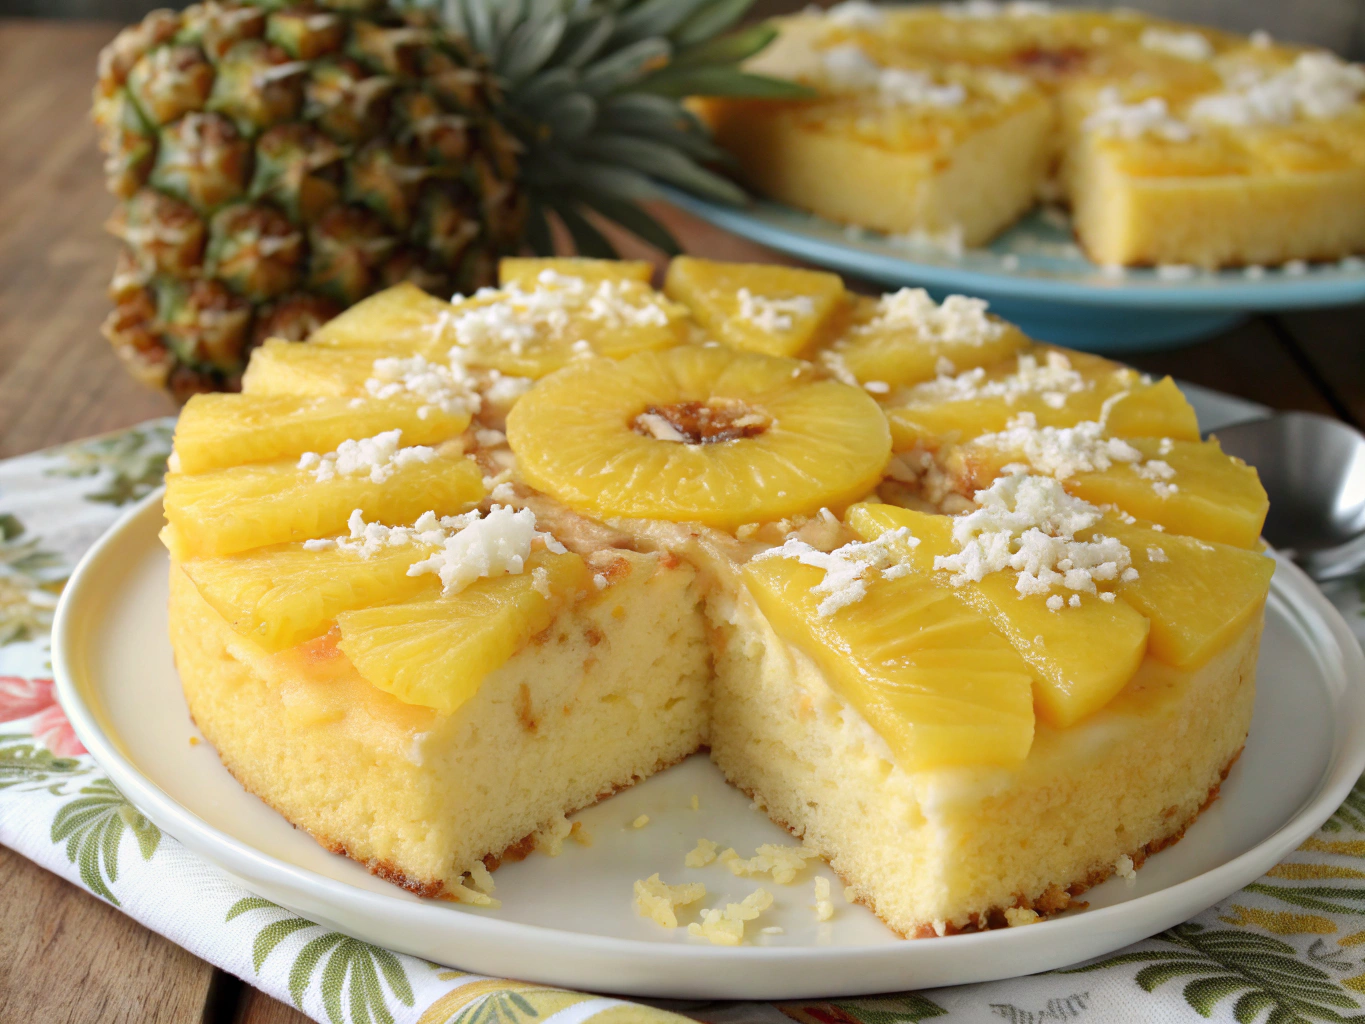
Juicy pineapple heaven cake is a sweet escape I turn to on those warm, sun-soaked afternoons here in sunny San Diego. There’s something magical about the way the pineapple melds into the fluffy cake, and you can almost hear my kids, Mateo and Camila, giggling as they devour their slices—especially when I let them add a mountain of whipped cream on top! After a long, messy day filled with crayons scattered everywhere and flour dust clouds from our latest baking adventure, this cake comes together effortlessly and brings a smile to my family’s faces, creating a delicious experience that’s unreachable by any store-bought dessert.
Why I Love Making juicy pineapple heaven cake
This juicy pineapple heaven cake is always on repeat in my home for many reasons. First, it’s such a breeze to whip up, making it the perfect choice for busy weeknights or spontaneous gatherings. One moment, I might be tackling a pile of laundry, and the next, I’m mixing ingredients, all while Mateo and Camila help out (or sometimes end up making an adorable mess!). Plus, it’s a wonderful treat that feels special and tropical yet comforting, reminding me of family vacations by the beach. Every bite beckons you to close your eyes and imagine a sunny beach somewhere far away, making it unforgettable!
Juicy Pineapple Heaven Cake
Equipment
- 9-inch round cake pan
- Mixing Bowl
- Electric mixer
- Spatula
Ingredients
Cake Mixture
- 1 cup all-purpose flour
- 1 cup granulated sugar
- 1/2 cup unsalted butter softened
- 2 large eggs
- 1 tsp vanilla extract
- 1 tsp baking powder
- 1 can crushed pineapple with juice
Topping
- 1 cup whipped cream
- 1/4 cup chopped nuts optional
Instructions
- Preheat your oven to 350°F (175°C) and grease the cake pan.
- In a mixing bowl, cream together the softened butter and sugar until light and fluffy.
- Beat in the eggs one at a time, followed by the vanilla extract.
- Sift together the flour and baking powder, then gradually add it to the creamed mixture.
- Stir in the crushed pineapple with its juice until well combined.
- Pour the batter into the prepared pan and smooth the top.
- Bake for 30-35 minutes or until a toothpick inserted into the center comes out clean.
- Allow the cake to cool before topping with whipped cream and chopped nuts if desired.
Notes
What Goes Into My juicy pineapple heaven cake

- 1 cup all-purpose flour
- 1 cup granulated sugar
- 1/2 cup unsalted butter, softened
- 2 large eggs
- 1 tsp vanilla extract
- 1 tsp baking powder
- 1 can crushed pineapple, with juice
- Topping: 1 cup whipped cream
- Optional: 1/4 cup chopped nuts
My Favorite Ingredient Swaps for juicy pineapple heaven cake
If you’re feeling adventurous or have some dietary preferences, I have found a few tasty swaps that work wonderfully! For a lighter version, consider substituting the all-purpose flour with whole wheat flour; it adds a lovely nutty flavor. You could also swap out the granulated sugar for coconut sugar to give it a tropical twist. My husband, Luis, loves this option because it complements the pineapple perfectly! If you want to take a break from dairy, you can use applesauce instead of butter, though the texture might be different—a bit denser but still delicious, especially if you’re layering it with whipped cream!
How I Make juicy pineapple heaven cake
Step 1: Preheat the Oven
Preheat your oven to 350°F (175°C) and grease the cake pan with some butter. If Camila is around, you can bet she’ll want to help with this step, smearing butter all over—just watch out for any extra splatters!
Step 2: Cream Butter and Sugar
In a mixing bowl, cream together the softened butter and sugar until it reaches a light and fluffy consistency. It’s the perfect opportunity for little hands to help; just make sure Mateo isn’t sneaking bites!
Step 3: Beat in Eggs and Vanilla
Next, beat in the eggs one at a time. Do this slowly, making sure each egg is well combined before adding the next one. After that, add the vanilla extract; the sweet scent will waft through your kitchen!
Step 4: Mix Dry Ingredients
Sift together the flour and baking powder, then gradually add this mixture to your creamed butter and sugar. It’s best to mix this part slowly; flour clouds can escape and create another mess for cleaning later!
Step 5: Fold in the Pineapple
Now for the fun part—stir in the can of crushed pineapple (including that juicy goodness). The batter will begin to look delightfully moist and fragrant, and I can already see Mateo’s eyes sparkle at the sight of the tropical fruit dessert!
Step 6: Bake the Cake
Pour the batter into the prepared pan and smooth out the top. Place it in the oven and bake for 30-35 minutes. I often set a timer and enjoy a little dance party in the kitchen with the kids while we wait (get ready for some impromptu karaoke)!
Step 7: Cool and Top
Once the cake is baked, allow it to cool before topping it with whipped cream and those optional chopped nuts. I like to let the kids choose how much they want on top—it’s always a fun way to make each slice unique!
How We Love to Serve juicy pineapple heaven cake
This cake shines best served chilled, especially on a hot summer day. My favorite way is to slice it up and arrange the pieces on our vibrant beach-themed plates, topped with a big swirl of whipped cream and a sprinkle of crunchy nuts. It’s a small ritual around our dinner table, where everyone waits eagerly, and we let out audible sighs at the first bite. We love to enjoy our cake while sharing stories of our day, keeping our family connected over good food and laughter.
What I’ve Learned Making juicy pineapple heaven cake Over and Over
One thing to avoid when making this cake is skimping on the cooling time. I’ve rushed before, wanting to serve it right away, but it really benefits from chilling in the fridge for a bit. The flavors meld beautifully, and the texture is so much better! Remember, check that your cake is fully baked by inserting a toothpick into the center—if it comes out clean, you’re golden!
Another practical tip? Don’t hesitate to get the kids involved! Cooking with them not only makes it a joyful experience for all but also creates special memories that will surely stick with them (and you!).
How I Store and Reheat juicy pineapple heaven cake
If you happen to have any slices left (a rare miracle in our busy household!), this cake can be stored in the refrigerator for up to three days. Simply cover it well to keep it fresh. If you’d like to enjoy it later, I suggest slicing and putting it in an airtight container in the freezer, where it can last for a couple of months. To reheat, simply allow it to thaw in the fridge overnight, then warm it gently in the oven at a low temperature for a few minutes. I sometimes reheat it just before serving to remind everyone of the scrumptious aroma!
A Little Note from Me
What this juicy pineapple heaven cake means to me is all about creating moments. My heart swells whenever I bake it with my kids, knowing I am instilling a love for cooking in them. This cake has become a part of our family traditions, filling our gatherings with laughter and sweetness—like a big, warm hug that everyone can share. There’s joy in every bite, and I can’t wait for each of you to experience that love in your very own kitchens.
FAQs about juicy pineapple heaven cake
Can I make juicy pineapple heaven cake ahead of time?
Absolutely! This cake can be made a day or two in advance. Just store it in the refrigerator after cooling down, and it’ll be ready to serve at your next gathering.
What can I serve with juicy pineapple heaven cake?
This cake pairs beautifully with fresh fruit, a scoop of vanilla ice cream, or even a light tropical fruit dessert salad made with strawberries, kiwi, and a hint of coconut.
Is it okay to add other flavors to the pineapple cake?
Definitely! I’ve experimented with adding a little coconut extract or a splash of rum to the batter. It enhances that tropical vibe and makes it even more delightful.
What toppings work best for juicy pineapple heaven cake?
Whipped cream is a classic, but you can also try it with cream cheese frosting to give it a richer flavor, or even top it with toasted coconut and nuts for extra crunch!
If you give this recipe a try, I’d love to see your take! Leave a comment below or tag @YummyCrafter on Pinterest. Let’s bake joy together!