
Classic cherry delight is the kind of dessert that makes my heart sing and my kids giggle with joy. I remember the first time I made this treat for my family; Luis had just come home from a long week at work, and the kids had been as lively as ever, causing delightful chaos around the kitchen. After a quick clean-up—thanks to Mateo who insisted on helping and Camila who, in her two-year-old wisdom, decided flour was meant for throwing—I surprised them with this delightful cherry dessert as a sweet end to a love-filled day. Simple, cozy, and utterly delicious, classic cherry delight is always a favorite at our San Diego table, especially during hot summer days when it’s nice to have something cooling in the fridge.
Why This classic cherry delight is Always on Repeat
I adore making classic cherry delight because it embodies everything I want in a family-friendly dessert: it’s easy, delicious, and provides a beautiful, colorful display. The creamy filling hugs the crunchy crust, while the cherry topping adds a pop of color that makes it a feast for the eyes as well as the taste buds. Plus, with both of my little ones involved in the process—Mateo is always keen on mixing and Camila enjoys adding the cherries—it turns into more than just a recipe; it becomes a joyful family tradition. There’s something heartwarming about gathering around the table, cherishing sweet moments together, while indulging in this nostalgic classic.
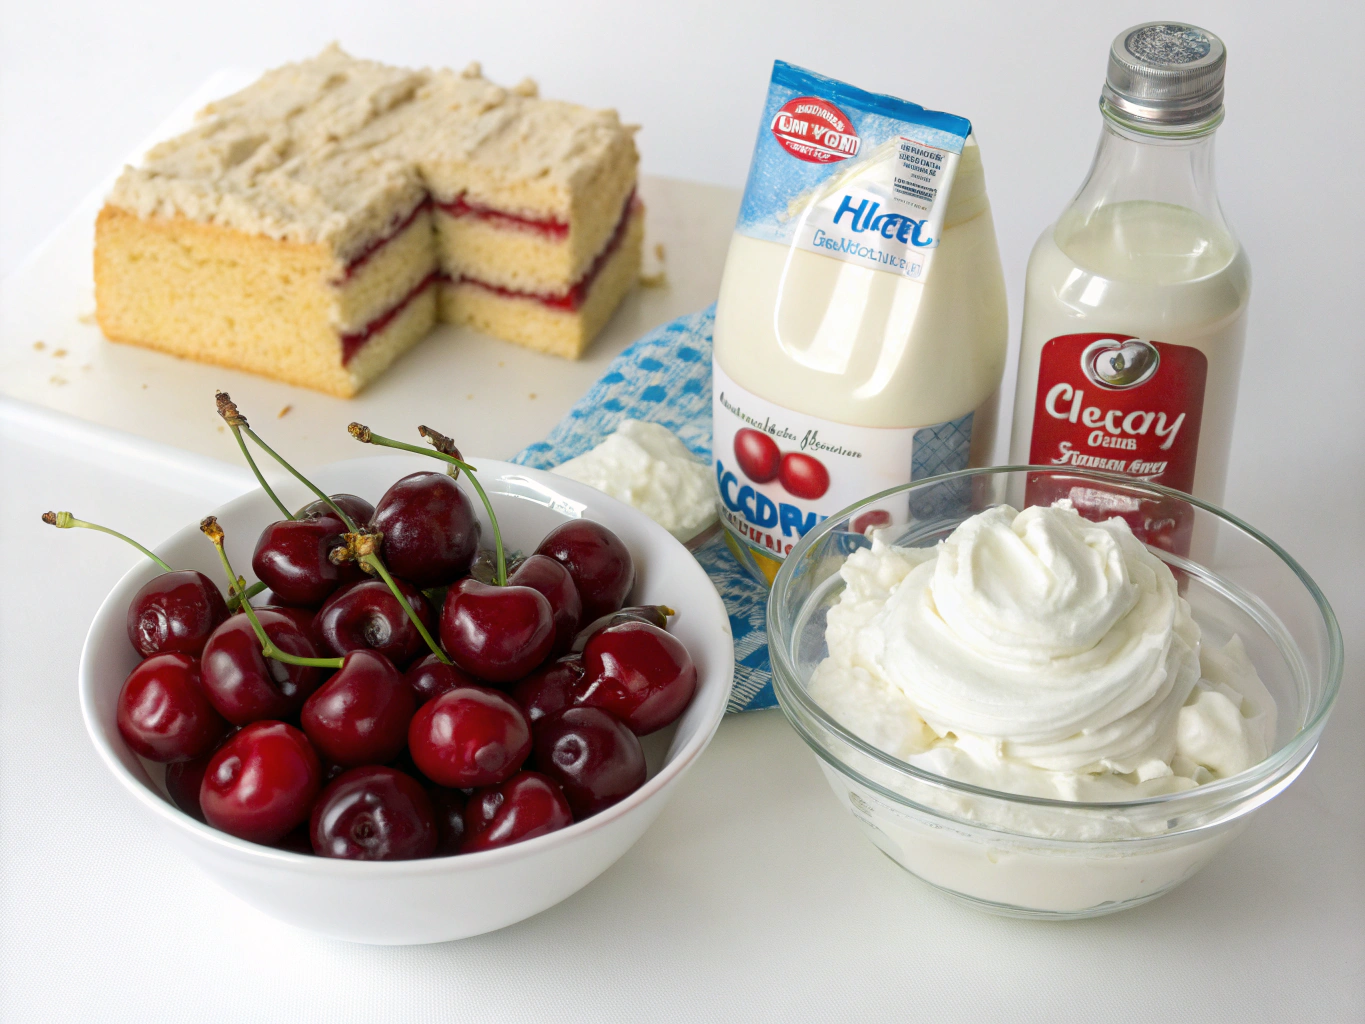
– 1 cup all-purpose flour
– 1/2 cup unsalted butter, softened
– 1/4 cup powdered sugar
– 1 cup cherry pie filling
– 8 oz cream cheese, softened
– 1 cup whipped topping, thawed
– 1/2 cup granulated sugar
– 1 tsp vanilla extract
My Favorite Ingredient Swaps for classic cherry delight
While the traditional recipe is always a hit, I love to switch things up sometimes! One fantastic way to give classic cherry delight a new twist is by experimenting with different flavors of pie filling. For instance, blueberry pie filling gives a delightful burst of flavor and complements the creamy filling beautifully, creating a whimsically colorful dessert that our kids adore. Another option is to use a mix of cream cheese with a hint of lemon juice for a tangy version that’s just as delightful. It’s all about finding those little tweaks that make it a bit different and even more fun for the family!
Classic Cherry Delight
Equipment
- 9-inch Pie Pan
- Mixing Bowl
- Whisk
- Refrigerator
Ingredients
Crust
- 1 cup all-purpose flour
- 1/2 cup unsalted butter softened
- 1/4 cup powdered sugar
Filling
- 1 cup cherry pie filling
- 8 oz cream cheese softened
- 1 cup whipped topping thawed
- 1/2 cup granulated sugar
- 1 tsp vanilla extract
Instructions
- Preheat your oven to 350°F (175°C).
- In a mixing bowl, combine flour, softened butter, and powdered sugar.
- Mix until a dough forms, then press it into the bottom of a 9-inch pie pan.
- Bake the crust for 15 minutes or until lightly golden. Remove and allow to cool.
- In another bowl, beat cream cheese, granulated sugar, and vanilla extract until smooth.
- Fold in the whipped topping until well combined.
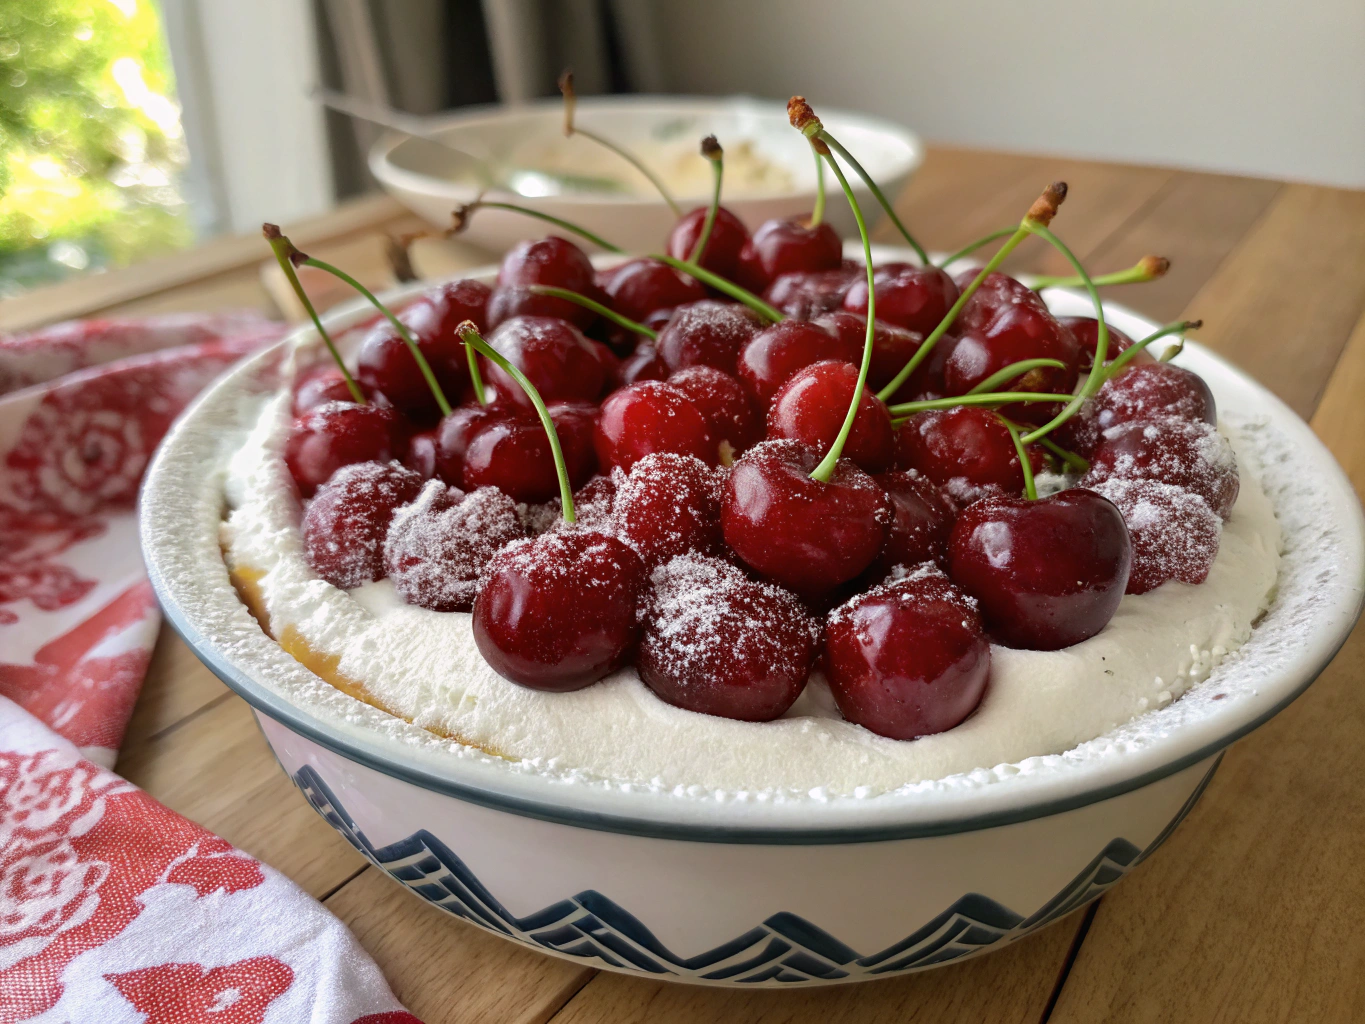
- Spread the cream cheese mixture over the cooled crust, then top with cherry pie filling.
- Refrigerate for at least 30 minutes before serving to set.
Notes
How I Make classic cherry delight
Step 1: Preheat the Oven
Preheat your oven to 350°F (175°C). This is an essential first step, and the scent of the warm oven will bring back so many memories while baking.
Step 2: Prepare the Crust
In a mixing bowl, combine flour, softened butter, and powdered sugar. Mateo loves getting his hands in the dough, and I promise, it’s a great way to get kids excited about cooking!
Step 3: Form the Crust
Mix until a dough forms, then press it into the bottom of a 9-inch pie pan. It doesn’t have to be perfect—after all, my motto is that baking should be fun, not stressful!
Step 4: Bake the Crust
Bake the crust for 15 minutes or until lightly golden. Once it’s out of the oven, let it cool down. Camila always finds the waiting part the hardest, so I usually schedule a little dance party while we wait!
Step 5: Make the Filling
In another bowl, beat together cream cheese, granulated sugar, and vanilla extract until smooth. This might become Luis’s favorite part as he can’t resist stealing a spoonful or two!
Step 6: Fold in the Whipped Topping
Fold in the whipped topping until the mixture is well combined. This step is so light and fluffy, bringing smiles all around.
Step 7: Assemble the Delight
Spread the cream cheese mixture over the cooled crust, then top it off with the cherry pie filling. Just look at those vibrant colors come to life—it’s a simple stunner!
Step 8: Chill and Enjoy
Finally, refrigerate for at least 30 minutes before serving to let it set. You’ll find the anticipation builds while we gather around the table, ready to dig in!
How We Love to Serve classic cherry delight
When it’s time to serve, I love to add a sprinkle of crushed graham crackers on top for that extra crunch! I usually cut it into squares, and the moment it’s placed on the table, you can hear Mateo asking for seconds before the first bite is even taken. Camila often insists on using her favorite bowls, which adds to the fun. Family gatherings become laughter-filled occasions as everyone enjoys their piece, chatting about the stories that inspired our classic cherry delight.
What to Avoid When Making classic cherry delight
When making classic cherry delight, one common mistake is not letting the crust cool completely before adding the filling. If you skip this step, the cream cheese mixture might melt, leaving you with a gooey mess rather than a delightful block of joy—trust me, I learned that the hard way. Also, ensure you’re using softened cream cheese to avoid any lumps in your filling; blending it well creates that velvety texture we all love. Finally, if you’re in a hurry, don’t skip the chilling time. It’s crucial for the flavors to meld, and it helps set the dessert, enhancing the overall experience.
Keeping classic cherry delight Fresh in My Kitchen
Leftovers (if you’re lucky enough to have any!) can be stored in an airtight container in the refrigerator for up to 3 days. I often find myself sneaking a spoonful late at night, reminiscing about the happy moments shared over this dessert. You could also freeze individual slices for a quick treat—just make sure to wrap them well!
A Little Note from Me
Classic cherry delight holds a special place in my heart because it’s more than just a recipe; it’s a vessel for memory-making with my family. It reminds me of a time when my own mother would whip this up after dinner, and now I get to weave those same moments into my kids’ lives. Whether it’s a regular weeknight or a cheerful gathering, classic cherry delight brings us all together, creating laughter and stories that we’ll carry for years to come.
FAQs about classic cherry delight
Can I make classic cherry delight ahead of time?
Absolutely! This is a fantastic dessert to prepare a day in advance. It will allow the flavors to meld beautifully, and it helps with managing time, especially during busy days.
What other fillings work well for this dessert?
In addition to cherry pie filling, you can experiment with other fruit fillings like blueberry or apple. Using seasonal fruits can turn this classic cherry delight into a variety of vintage dessert recipes that everyone enjoys!
Can I use a store-bought crust?
Of course! If you’re short on time, a store-bought graham cracker crust is a great alternative. It still holds up well and provides that same delightful crunch.
How do I fix a runny filling?
If you find that your filling is too runny, it might be due to not incorporating the whipped topping thoroughly. Fold it in gently to retain the airiness, or consider refrigerating a bit longer to let it set more effectively.
If you give this recipe a try, I’d love to see your take! Leave a comment below or tag @YummyCrafter on Pinterest. Let’s bake joy together!